Showing posts with label paint. Show all posts

Monday, January 12, 2015

Quick fireplace paint project

About a year ago, I whitewashed the brick on the fireplace in our living room.  I don't know what it is, but I just haven't been thrilled with the look since then, but wasn't really sure what I wanted to do.  Go all white?  Go black?  Maybe a dark gray?


Over the holidays when catching up on blog reading, one of the blogs I love mentioned painting the INSIDE of the fireplace black.  I had wondered if this was an option, but never really looked into it. 


So I went over to Home Depot and grabbed a couple cans of high heat spray paint.  Once I took out the logs and vacuumed the space, I realized just how gross it was!  I couldn't wait to get it painted.  


I taped off the brick and covered everything around the fireplace in plastic.  I couldn't get the flume open, but figured that wasn't a big deal...so I started spraying!  


It went really quickly, and I didn't use 2 full cans.  I will say...it blew a black dust back at me, which coated the floor all around me!  Ah!  Much like when we had the kitchen island spray painted...

You can see it all over the clear plastic in the photo above.  I noticed about halfway through, so we cleaned it all up and then covered a lot more with a plastic drop cloth.  It was definitely messier than I anticipated.  But we were able to clean up all of the floors, and it didn't get on the sofa or anything.  So if you attempt this project, be sure to either open the flume and/or cover everything well!  


It looks so much better.  I painted the 2 log holders, too, and I like how they just blend into the back ground and the logs stand out. 


I had originally gotten 4 cans of paint so I could do the basement fireplace, too.  I might be returning the spray cans for regular paint and just slap it up there...I don't want black dust all over the carpet in the basement!


PS - I finally took the 'after' kitchen photos this weekend, so I hope to get a final post about that up this week!


Monday, September 22, 2014

Kitchen reno - island part 2

It's been a couple of weeks since the guys installed the island and the new panel has arrived.  The guys installed the new panel, and it looks so much better - there's not a huge gap running down the back of it!  So the painter came back, with the pre-painted doors and molding.  The molding was installed, and the spray painting began.


I'm really glad we opted to put molding around the base and on the 2 legs.  It really gives it a finished, custom, built in look.  


We opted to have the island painted once in the kitchen, and painted with a sprayer to give it a nice, professional finish.  It was a little terrifying for the few minutes he was spraying, as the paint color is navy and the rest of the kitchen is white!


But he had on a white shirt, so that gave me a little bit of comfort...


It just took 2 quick coats, and it was finished!  The sprayer left a fine dust all over the floors and counters, that did come up.  However, I would suggest covering more than we did for peace of mind.  He said that was enough to cover, but we had to bring out the Magic Eraser to get some blue streaks off of the new counters.  So - my tip - if you ever have your cabinets sprayed in the room - cover everything!

Moving right along - now we just need to install the final appliances in the island and put in the final touches, and it's finished!


Kitchen reno, previous posts:

Monday, August 25, 2014

Kitchen reno - counter tops, hardwood finishing and paint

Week 5 got off to a bit of a hectic start - counter top installation AND hardwood sanding and finishing both on the same day...much to the contractors' frustration.  I've learned that they don't really like when there are 2 different groups in there at once.  


The hardwoods that we had installed were unfinished, so they had to be sanded down and then stained.  My goodness the DUST!  I thought drywall dust was bad....

About an hour into the sanding, the counters arrived.  So the hardwood guys took a break, got some fresh air, and the counter top installers went to work.  When we were looking at different options, we knew we wanted something lighter than the last house - and something that looked like white marble without all of the maintenance issues of marble.  We also decided that we liked the durability of quartz, so looked at several different quartz brands - Silestone, Cambria, Caesarstone.  

Our 2 favorites were Cambria's Torquay and Caesarstone's London Gray.  We really liked the London Gray the best - it was a little darker, would make the cabinets look pure white, and didn't look as manufactured as the Torquay.  However, the prices that our contractor was able to find left a bit to be desired - the London Gray was TWICE the price of the Torquay...not sure we liked it THAT much....


So M decided to give it a try and set out to call around and price check some things.  First he called the folks at Pyramid Granite who installed the granite in the townhouse.  They were able to get us the London Gray at the same price as the Cambria!  


They are great to work with.  Claudia and M emailed back and forth to coordinate everything, and the guys work quickly and had everything installed in an hour.  


Once the counters were in...back to sanding...


We had them do the whole kitchen plus the stairs, so it would all be the same color.  One quick coat of clear stain went on, and they were gone!  They came back Tuesday to put a coat of polyurethane down, and we couldn't walk on them for 24+ hours...


M was out of town during all of this, so I snuck in before the polyurethane went down to get some quick pictures to send to him!


Having counter tops in makes a big difference, it's starting to look like a kitchen!  A couple of days off for the floors to really dry well, and the guys were back at the end of week 5 to put the appliances in, finish putting handles on, hook up the sink, and patch some final drywall.  


Our painter, who was originally scheduled to come not for another 3+ weeks, called last minute on Friday of week 5 with an opening the next day - so of course we jumped on it!!  Canyon Cloud, be gone!  We are painting the mudroom, kitchen, and sunroom all the same color because they are all connected together.  I was traveling on business so I called M real fast to run to Sherwin Williams and grab some paint!  Walls and ceiling - it's so great to have it all finished.  AND we got in during the 35% off sale, too.  


Week 6 starts with tiling the back splash....then a few days off before the island piece comes in, is installed, and painted, which should be the final steps!  We have moved our food and plates, utensils, etc back in... it's only a matter of time!


Kitchen reno, previous posts:


Wednesday, April 9, 2014

Another weekend, another paint project

Last weekend, I got out the white paint and set to cover up some of the wood in the house.  We have beautiful wood floors on the main level, but it has a little bit of a dated feel too it...especially the stairs.  So I painted all of the risers and the 2 spindles that were wood.  I have plans to come back and paint the railings black, but that's for another day.

Here are the befores from before we moved in:


Progress....it took 4 coats of Behr's paint and primer in one in semi-gloss. 


And finished!


Someone was tired of being blocked from the stairs all day!


The 2 banisters actually took 5 coats....but it was totally worth it.


Such a difference!  Much lighter and more modern looking.  I can't wait to get the railings painted soon, too!


Tuesday, March 25, 2014

Feeling a little green

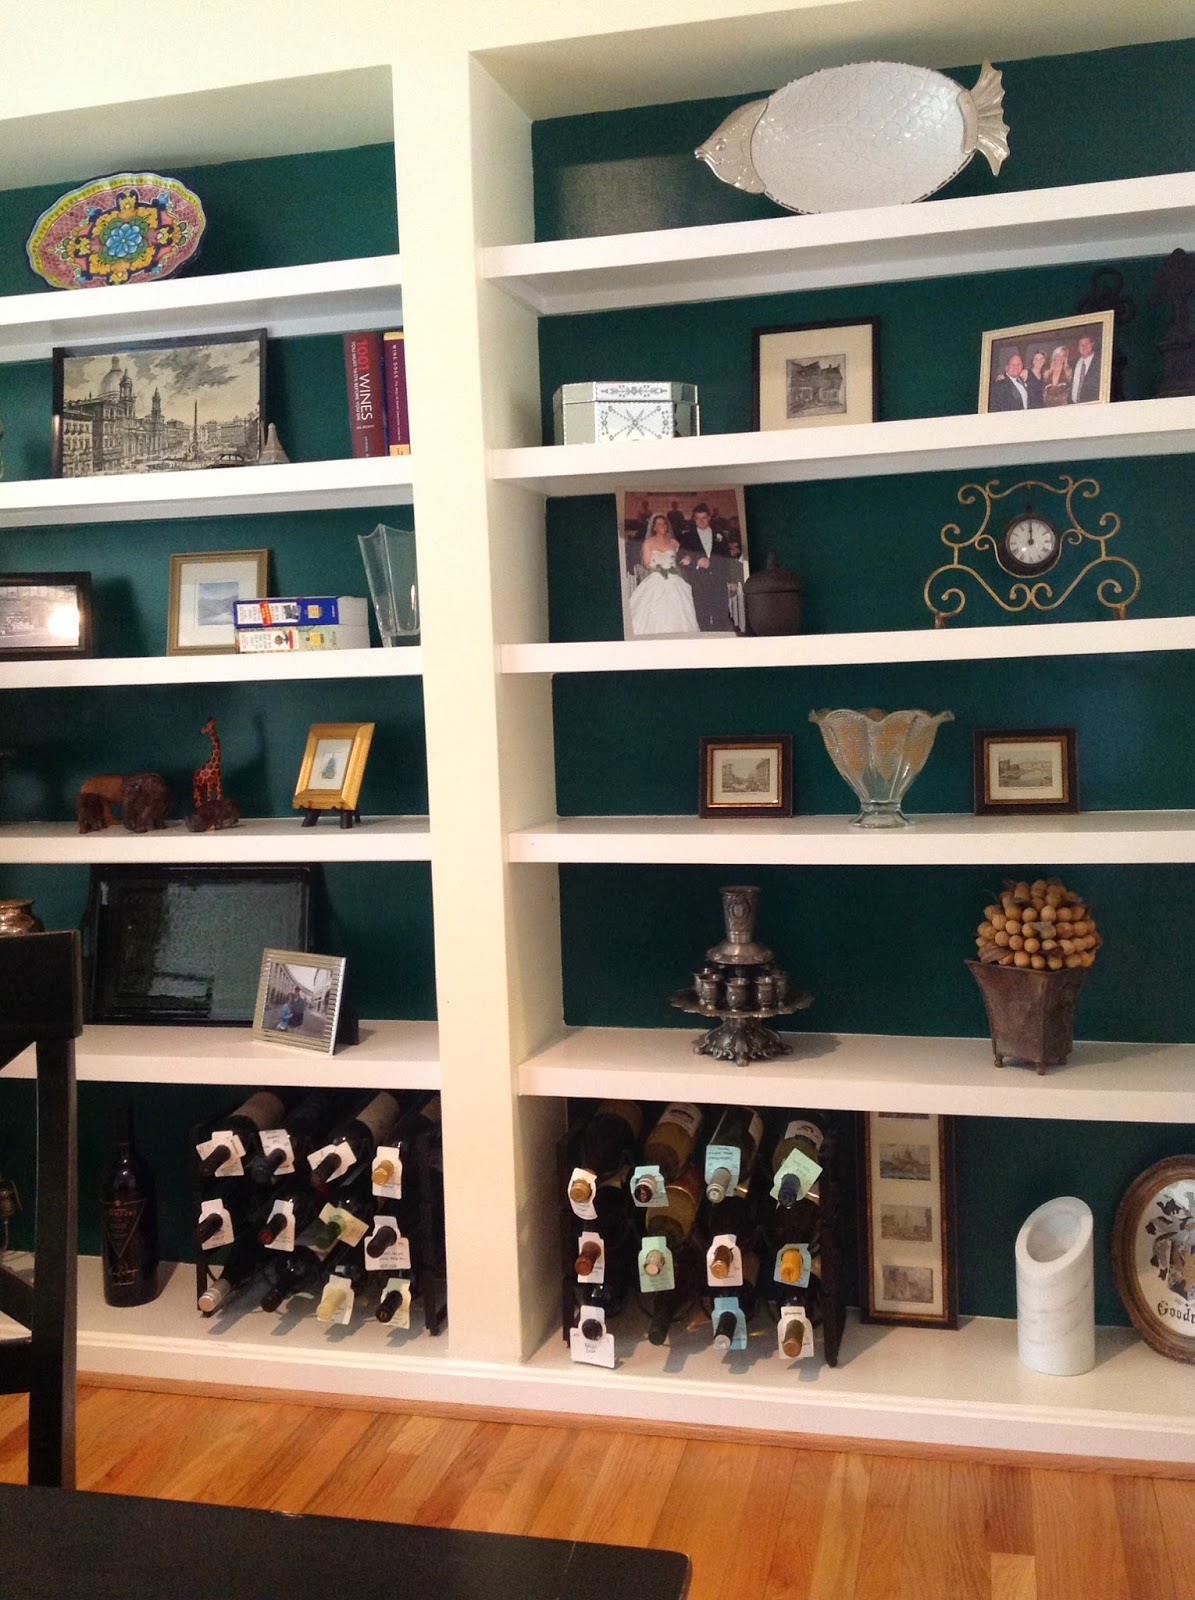
We are slowly starting to make small changes around the house to freshen it up a little, and make it feel a little more youthful.  Since we moved in, I knew I wanted to paint the back of the bookcase in the dining room, similar to what I had done in townhouse.  


Everything in the house is Canyon Cloud.  It's a light, pale yellow color that's starting to drive me nuts.  So I decided this would be an easy, quick weekend project that I could do to bring some new color into the house.  


I decided (with the help of a paint colorist) on True Green from Benjamin Moore.  I had it matched to a semi-gloss paint and primer in one from Behr.  


It ended up taking longer than I expected (doesn't it always?) because I had to do 3 full coats.  And the shelves are literally built in, so I couldn't remove them to just paint the whole wall.  


But I think it turned out great!  In the old house, I felt the color made everything pop out more...here, I feel like it's harder to see some darker items.  So I've done a bit of rearranging to bring in some lighter, clear pieces.  I think I still have some editing to do, but it will do for now.  I feel like YHL, on the hunt for pretty white things to put on my shelves!    


Monday, February 6, 2012

Kitchen finale!

I know I haven't talked much about our home projects or our kitchen redo since July, but I have some new reports for you.  I'm incredibly late getting to this, but...better late than never!

You might recognize this picture from right after we finished the tile...in July.  Well, for the rest of the summer and into the fall, this is what my kitchen looked like.  We were actually really getting used to not having to open or close cabinet doors!


And our lower level looked like this...for months.  With 1 coat of primer and 2 coats of paint on each side of the doors, this turned out to be quite an intense process.  That was after the filling of holes and cracks and drilling of new holes for the new hinges.


Once the doors were finished, husband prepped the bases of the cabinets in the kitchen while I was away at Homecoming.  He filled the existing hinge holes, cleaned and sanded everything, covered everything in plastic and put tape along the shelf edges and other places we wanted to protect. 


I took the opportunity to touch up some other eye sores, like our pantry door.  I knew it was ugly, but I'm not sure I ever realized just HOW ugly - this is just primer on it, and look at the difference!! 


Plus, the bottoms of the cabinets were brown.  Like, dark brown.  I'm hoping that I've finally covered everything that used to be brown in our house with a better color. 


Then we had to hang the doors.  This wasn't as bad as it sounds, but was still a chore.  We both said several times if we'd realized how BIG of a project this was, we would have just torn them out and bought all new from Ikea or somewhere like that...


But we do love the result.  We have new hinges, the hidden hinges, which really make a difference.  M was determined to change the hinges, and I didn't really think it would matter - but it gives the kitchen a more modern, cleaner feel.  We also replaced all of the hardware - so from a darker metal to a nice brushed nickel.  They look great with the stainless steal.  It's quite a change, and we're definitely glad it's finished! 

Before the big reveal, lets remember...


Before...look at that AWFUL refrigerator! Ugh.


And now!


We really love it.  The new appliances are beautiful, and I love the cupped drawer pulls.  I've always wanted those!  Sorry it took so long to do this post, but even with the elapsed time I wanted to show you the finished product!