Showing posts with label kitchen. Show all posts

Wednesday, September 28, 2016

Kitchen finale!

Better late than never?! 

It's only been almost 2 years since this project was finished...but about the time I was ready to write a 'reveal' post, my computer crashed...I'm finally getting around to finishing this post.  We are still on the hunt for a colorful runner to go in front of the sink, and finally have the photograph I've been wanting, that I still need to frame, for the big empty spot between the windows, but we're getting there!  We absolutely love our kitchen, and are so glad we didn't wait too long after moving in to remodel it.

Enjoy a good 'before and after' show!


One of my favorite parts of the kitchen is the tv.  Now, when I'm cooking dinner and there's a Nats game or something else on, I don't have to keep shouting to the den to see what's happening!  And, we put it on a movable arm, so we can hide it. 

Now you see it....


Now you don't!  


We also connected in a Sonos speaker above the cabinets so we can have music in the kitchen, which I have on almost all the time.  


Microwave, trash can/recycling and beverage center all in the island.


We absolutely love it, and as they say, everyone really does live in our kitchen!


Source list:
Cabinets - Ikea
Island cabinets - Barker
Contractor - Moss Building and Design
Floors - Artisan Floors
Mudroom floor tile - Lowes
Counter tops - London Gray quartz by Caesarstone - Pyramid Granite
Backsplash tile - Sixth Sense, 4x8 from Mosaic Tile
Over counter pendants - West Elm
Kitchen table pendant - Crate and Barrel
Hardware - Restoration Hardware
Paint color, island - BM Polo Blue
Paint color, walls - BM Gray Owl
Stools: World Market
Kitchen Table: CB2
Chairs: Overstock

Monday, September 22, 2014

Kitchen reno - island part 2

It's been a couple of weeks since the guys installed the island and the new panel has arrived.  The guys installed the new panel, and it looks so much better - there's not a huge gap running down the back of it!  So the painter came back, with the pre-painted doors and molding.  The molding was installed, and the spray painting began.


I'm really glad we opted to put molding around the base and on the 2 legs.  It really gives it a finished, custom, built in look.  


We opted to have the island painted once in the kitchen, and painted with a sprayer to give it a nice, professional finish.  It was a little terrifying for the few minutes he was spraying, as the paint color is navy and the rest of the kitchen is white!


But he had on a white shirt, so that gave me a little bit of comfort...


It just took 2 quick coats, and it was finished!  The sprayer left a fine dust all over the floors and counters, that did come up.  However, I would suggest covering more than we did for peace of mind.  He said that was enough to cover, but we had to bring out the Magic Eraser to get some blue streaks off of the new counters.  So - my tip - if you ever have your cabinets sprayed in the room - cover everything!

Moving right along - now we just need to install the final appliances in the island and put in the final touches, and it's finished!


Kitchen reno, previous posts:

Monday, August 18, 2014

Kitchen reno - island

During the planning process, we decided we wanted to have an accent color on the island.  With a relatively white/gray color scheme, we decided to go with something different on the island.  The color options with Ikea are limited, so we M did some research, and found a cabinet maker called Barker in Oregon to order the island from that could make doors and panels to match the other cabinets.  We ordered the island weeks before construction started, with a plan of it shipping in 5-6 weeks.  Well, 8 weeks later, after some shipping 'challenges' and delays, it finally arrived.  In dozens of pieces, the pallet was delivered to our driveway.  


These are made in the same way as Ikea - assembly required.  So after they arrived Monday morning, that Monday night, we assembled everything for our contractors to install.  


We set everything out, measured the distances around the island, taped some pieces together with bue tape and left it to walk our contractors through our plan the next morning. 


When we got home from work on Tuesday, the island was installed.  And the recessed lights moved...once we got the island in the room, it was even more obvious that the 3 lights along the main wall weren't spaced properly.  Our contractor Steve, while he hesitated at the additional work, agreed that they were off center and we decided to shift them over a bit.  I'm so glad we did this!


The island will house a wine fridge, our trashcans, and drawer microwave.


Once everything was in, we noticed a few spaces between the back panels.  The one space was about 1/8" between the panels, which is very obvious.  We could caulk it, but over time it will expand and crack...


So....the saga continues.  We complained to the cabinet maker, so he's going to send us a new panel.  It should be here in 2 weeks...so the island is on hold a bit.  It has been primed, and the painter took the doors and trim home to paint while we wait for the panel.  It will be here soon...but at least the island is in, so we were able to measure for the counters and have them installed while we wait, and other items are finished.


Kitchen reno, previous posts:


Monday, August 11, 2014

Kitchen reno - hardwood and cabinet installation

Moving right along, it was time for the dated vinyl floors to come up and hardwood to go down.  

When installing hardwood, the planks have to go perpendicular to the floor joists so they have support all the way across the room.  We discovered during the planning process that our floor joists change directions in the middle of the room.  Another little snag... so this means that we had a couple of options.  We could change the hardwood direction halfway through the room.  We could rebuild floor joists so we could run it all one way.  OR - we could go diagonally!  We were a little skeptical at first, but we LOVE the floors!!  


To give you a time frame reference, they were installed on the Friday of the second full week.


Once the floors were in, it was time to go to work installing cabinets.  Monday of the third week, they started on cabinets.  As you may remember from a previous post, we put them all together, and the contractors are installing them.  M stayed home the two main installation days to help them find the right cabinets, pieces, etc since they were a bit all over the place.  

After day 1 of cabinet installation
Ikea cabinets are installed on the wall a little differently than others.  They go on a track system.  So you hang a track on the wall (see the top middle-left of the photo) and nailed into the studs.  Then you hang the cabinets from the track, and bolt them together.  


The fridge will go here, and a TV will be installed above the fridge - thanks to the blog Design Megillah for the idea!


We also got new cabinets for the mudroom.  While we were doing the construction, we thought we should just go ahead and replace those as well.  Plus we wanted another big pantry cabinet for things like boots, umbrellas, Cady's dog food, etc.


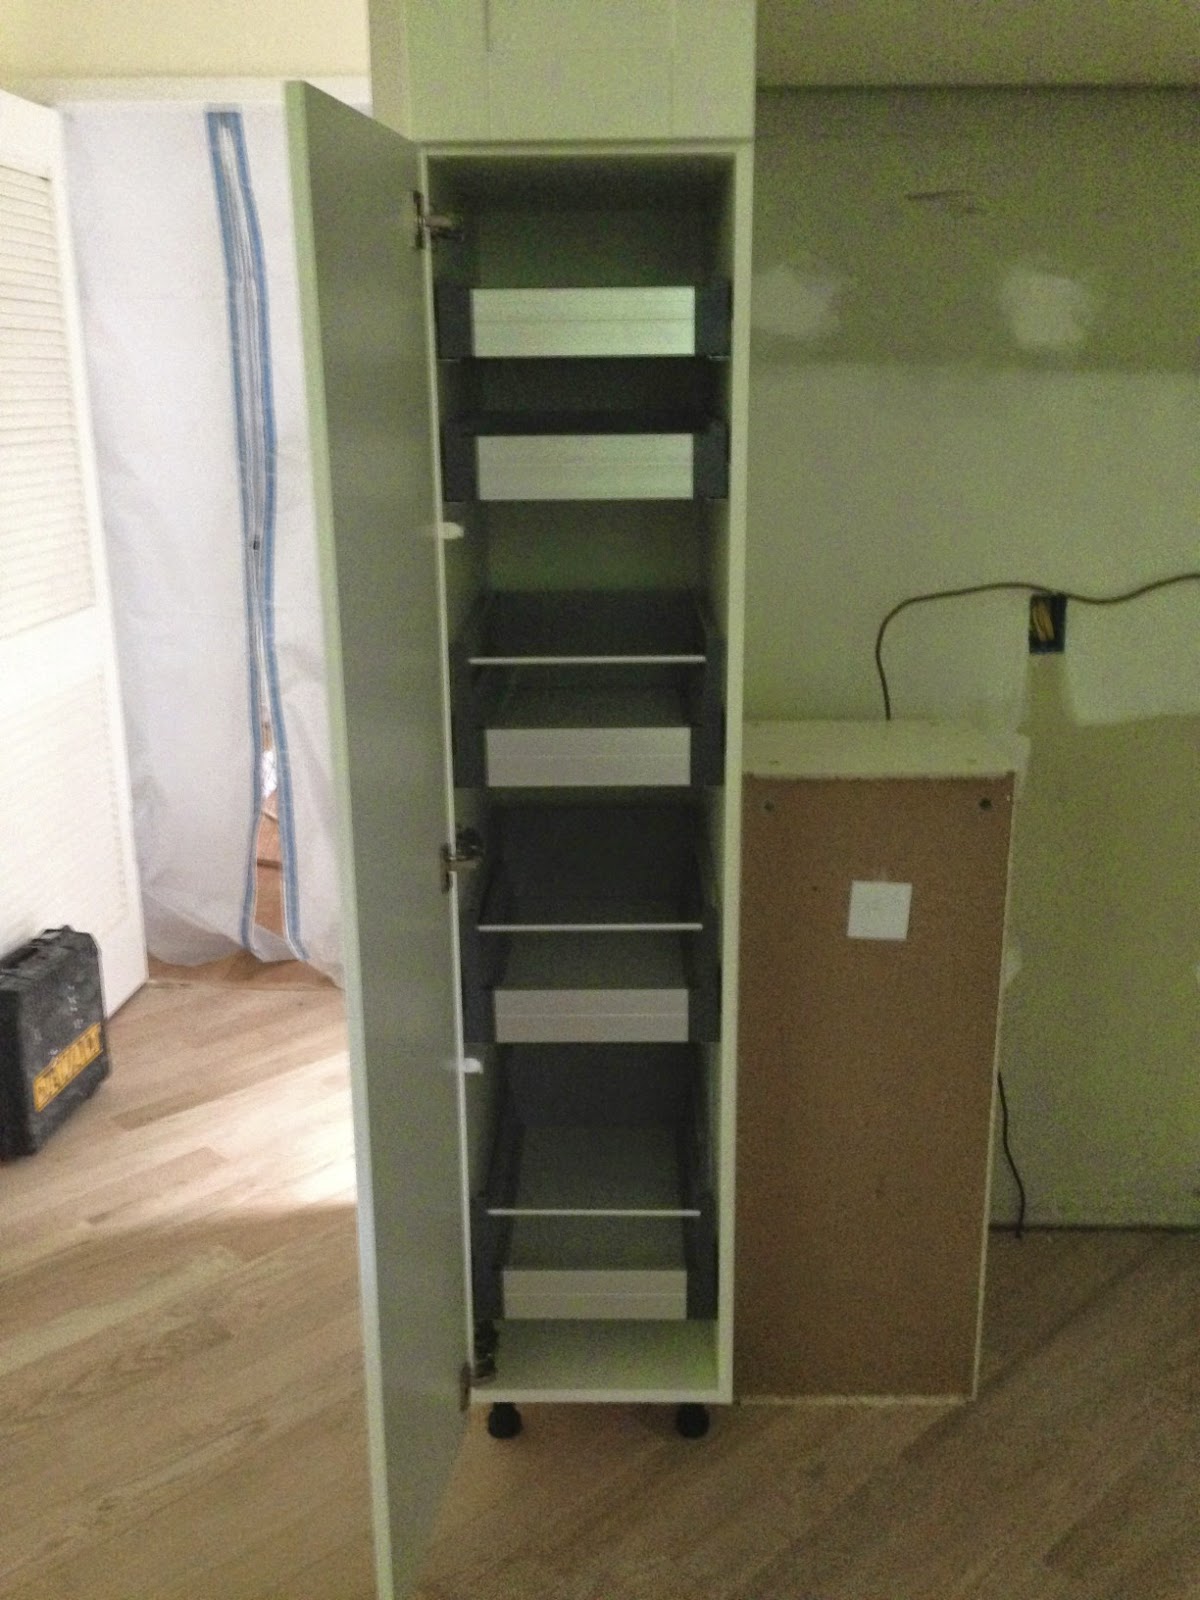
So part of the deal with the contractors was that we would also finish putting the cabinets together once up.  M said this was WAY worse than the initial part that we thought was relatively easy and quick!  He spent hours in the kitchen installing drawers, slide out shelves, and putting the finishing touches on everything.


But having all of these shelves in the new cabinet pantry is going to be great!


Moving right along!  It's starting to look like a kitchen!  At this point we're waiting on the island to be delivered so it can be installed, then countertops measured and installed, floors finished, more lights installed, tile, hood and appliances!  We are now finished with week 3...


Kitchen reno, previous posts: